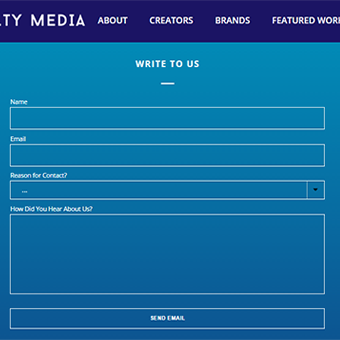
Our contact form is simple enough to execute and requires three files. I will explain the whole concept in 3 simple steps. The codes for each part contain necessary notes for your convenience.
Step-1 ☆ Creating Functional HTML Code Integrating jQuery
At first, you have to create an index.html file.Then paste the following code directly into your HTML file.
<h2><span style="font-family: helvetica, arial, sans-serif; font-size: 20px;">Dynamic HTML Contact Form</span></h2>
<!-- BOOTSTRAP CSS FROM CDN -->
<div class="container">
<!-- CONTACT FORM ROW -->
<div class="row">
<!-- CONTACT FORM -->
<div class="col-sm-12">
<div class="contact">
<h3 class="contact-heading">Send Us an Email</h3>
<form id="contact" class="contact-form"><!-- IF MAIL SENT SUCCESSFULLY -->
<h6 class="success">Your message has been sent successfully.</h6>
<!-- IF MAIL SENDING UNSUCCESSFULL -->
<h6 class="error">Error! Please provide valid information.</h6>
<div class="field-wrapper"><input id="cf-name" class="form-control input-box" name="cf-name" type="text" placeholder="Name" /></div>
<div class="field-wrapper"><input id="cf-subject" class="form-control input-box" name="cf-subject" type="text" placeholder="Subject" /></div>
<div class="field-wrapper"><input id="cf-email" class="form-control input-box" name="cf-email" type="email" placeholder="Email Address" /></div>
<div class="field-wrapper"><textarea id="cf-message" class="form-control textarea-box" name="cf-message" rows="10" placeholder="Write Your Message Here"></textarea></div>
<button id="cf-submit" class="btn standard-button" name="submit" type="submit" data-style="expand-left">Submit Now</button>
</form></div>
</div>
<!-- /.END CONTACT FORM -->
</div>
<!-- /.END CONTACT FORM ROW -->
</div>
<!-- jQuery FROM CDN -->
<script src="https://code.jquery.com/jquery.min.js"></script><script>// <![CDATA[ jQuery(document).ready(function($) { /* ================================= === CONTACT FORM ==== =================================== */ $("#contact").submit(function (e) { e.preventDefault(); var name = $("#cf-name").val(); var email = $("#cf-email").val(); var subject = $("#cf-subject").val(); var message = $("#cf-message").val(); var dataString = 'name=' + name + '&email=' + email + '&subject=' + subject + '&message=' + message; function isValidEmail(emailAddress) { var pattern = new RegExp(/^((([a-z]|\d|[!#\$%&'\*\+\-\/=\?\^_`{\|}~]|[\u00A0-\uD7FF\uF900-\uFDCF\uFDF0-\uFFEF])+(\.([a-z]|\d|[!#\$%&'\*\+\-\/=\?\^_`{\|}~]|[\u00A0-\uD7FF\uF900-\uFDCF\uFDF0-\uFFEF])+)*)|((\x22)((((\x20|\x09)*(\x0d\x0a))?(\x20|\x09)+)?(([\x01-\x08\x0b\x0c\x0e-\x1f\x7f]|\x21|[\x23-\x5b]|[\x5d-\x7e]|[\u00A0-\uD7FF\uF900-\uFDCF\uFDF0-\uFFEF])|(\\([\x01-\x09\x0b\x0c\x0d-\x7f]|[\u00A0-\uD7FF\uF900-\uFDCF\uFDF0-\uFFEF]))))*(((\x20|\x09)*(\x0d\x0a))?(\x20|\x09)+)?(\x22)))@((([a-z]|\d|[\u00A0-\uD7FF\uF900-\uFDCF\uFDF0-\uFFEF])|(([a-z]|\d|[\u00A0-\uD7FF\uF900-\uFDCF\uFDF0-\uFFEF])([a-z]|\d|-|\.|_|~|[\u00A0-\uD7FF\uF900-\uFDCF\uFDF0-\uFFEF])*([a-z]|\d|[\u00A0-\uD7FF\uF900-\uFDCF\uFDF0-\uFFEF])))\.)+(([a-z]|[\u00A0-\uD7FF\uF900-\uFDCF\uFDF0-\uFFEF])|(([a-z]|[\u00A0-\uD7FF\uF900-\uFDCF\uFDF0-\uFFEF])([a-z]|\d|-|\.|_|~|[\u00A0-\uD7FF\uF900-\uFDCF\uFDF0-\uFFEF])*([a-z]|[\u00A0-\uD7FF\uF900-\uFDCF\uFDF0-\uFFEF])))\.?$/i); return pattern.test(emailAddress); }; if (isValidEmail(email) && (message.length > 1) && (name.length > 1)) {
$.ajax({
type: "POST",
url: "sendmail.php",
data: dataString,
success: function () {
$('.success').fadeIn(1000);
$('.error').fadeOut(500);
}
});
}
else {
$('.error').fadeIn(1000);
$('.success').fadeOut(500);
}
return false;
});
});
// ]]></script>
Step-2 ☆ Integrating CSS to the Contact Form
Create a file namely style.css (as we mentioned the reference earlier in line 9 of index.html file. The following codes are for your stylesheet.
/*---------------------------------------
4.6.2 CONTACT FORM
-----------------------------------------*/
.contact-form { width: 480px }
.contact-form .success,
.contact-form .error { display: none }
.contact-form .input-box { min-height: 50px }
.contact-form .input-box,
.contact-form .textarea-box {
margin-bottom: 15px;
margin-top: 15px;
outline: 0;
border: 0;
-moz-box-shadow: none;
-webkit-box-shadow: none;
box-shadow: none;
border: 1px solid #e3e3e3;
-moz-border-radius: 0;
-webkit-border-radius: 0;
border-radius: 0;
color: #727272;
padding-left: 12px;
font-size: inherit;
line-height: inherit;
width: 100%;
}
.contact-form .standard-button {
background: #739438 none repeat scroll 0 0;
color: #fff;
font-weight: 700;
padding: 15px 30px;
text-transform: uppercase;
}
.success {
color: #fff;
font-size: 16px;
white-space: nowrap;
font-weight: 400;
background: #739438;
line-height: 28px;
text-align: left;
position: relative;
padding-left: 40px;
}
.error {
background: #f00 none repeat scroll 0 0;
color: #fff;
font-size: 16px;
font-weight: 400;
line-height: 28px;
padding-left: 40px;
position: relative;
text-align: left;
white-space: nowrap;
}
#contact .icon-style { font-size: 18px }
.contact-form .standard-button:hover,
.contact-form .standard-button:focus { color: #a0ce4e }
.field-wrapper textarea:focus, .field-wrapper input:focus{outline: 1px solid #739438}
Step-3 ☆ Creating a .php File
Copy the following code directly into your .php file. We named the file sendmail.php as we mentioned it in index.html line no. 40. You can use your desired email address in line 16 of your .php file.
<!--?php // Email Submit // Note: filter_var() requires PHP >= 5.2.0<br ?--> if ( isset($_POST['email']) && isset($_POST['name']) && isset($_POST['subject']) && isset($_POST['message']) && filter_var($_POST['email'], FILTER_VALIDATE_EMAIL) ) {
// detect & prevent header injections
$test = "/(content-type|bcc:|cc:|to:)/i";
foreach ( $_POST as $key => $val ) {
if ( preg_match( $test, $val ) ) {
exit;
}
}
$headers = 'From: ' . $_POST["name"] . '<' . $_POST["email"] . '>' . "\r\n" .
'Reply-To: ' . $_POST["email"] . "\r\n" .
'X-Mailer: PHP/' . phpversion();
//
mail( "wpdivine@gmail.com", $_POST['subject'], $_POST['message'], $headers );
}
?>
Output of the Project
- Complete Contact Form After Step 1

- Validation Message for Incomplete Form Submission

The screenshot for success message was not included in the post. We will be able to view the message only if your files are hosted in a public server (not your local server) and all the data are valid for the fields. Thank you for being with us. I will return with another useful topic soon.


